*This post contains affiliate links. See the end of the post for more details. The waistcoat trend has been one of my favourite trends this season. There ar…
*This post contains affiliate links. See the end of the post for more details.
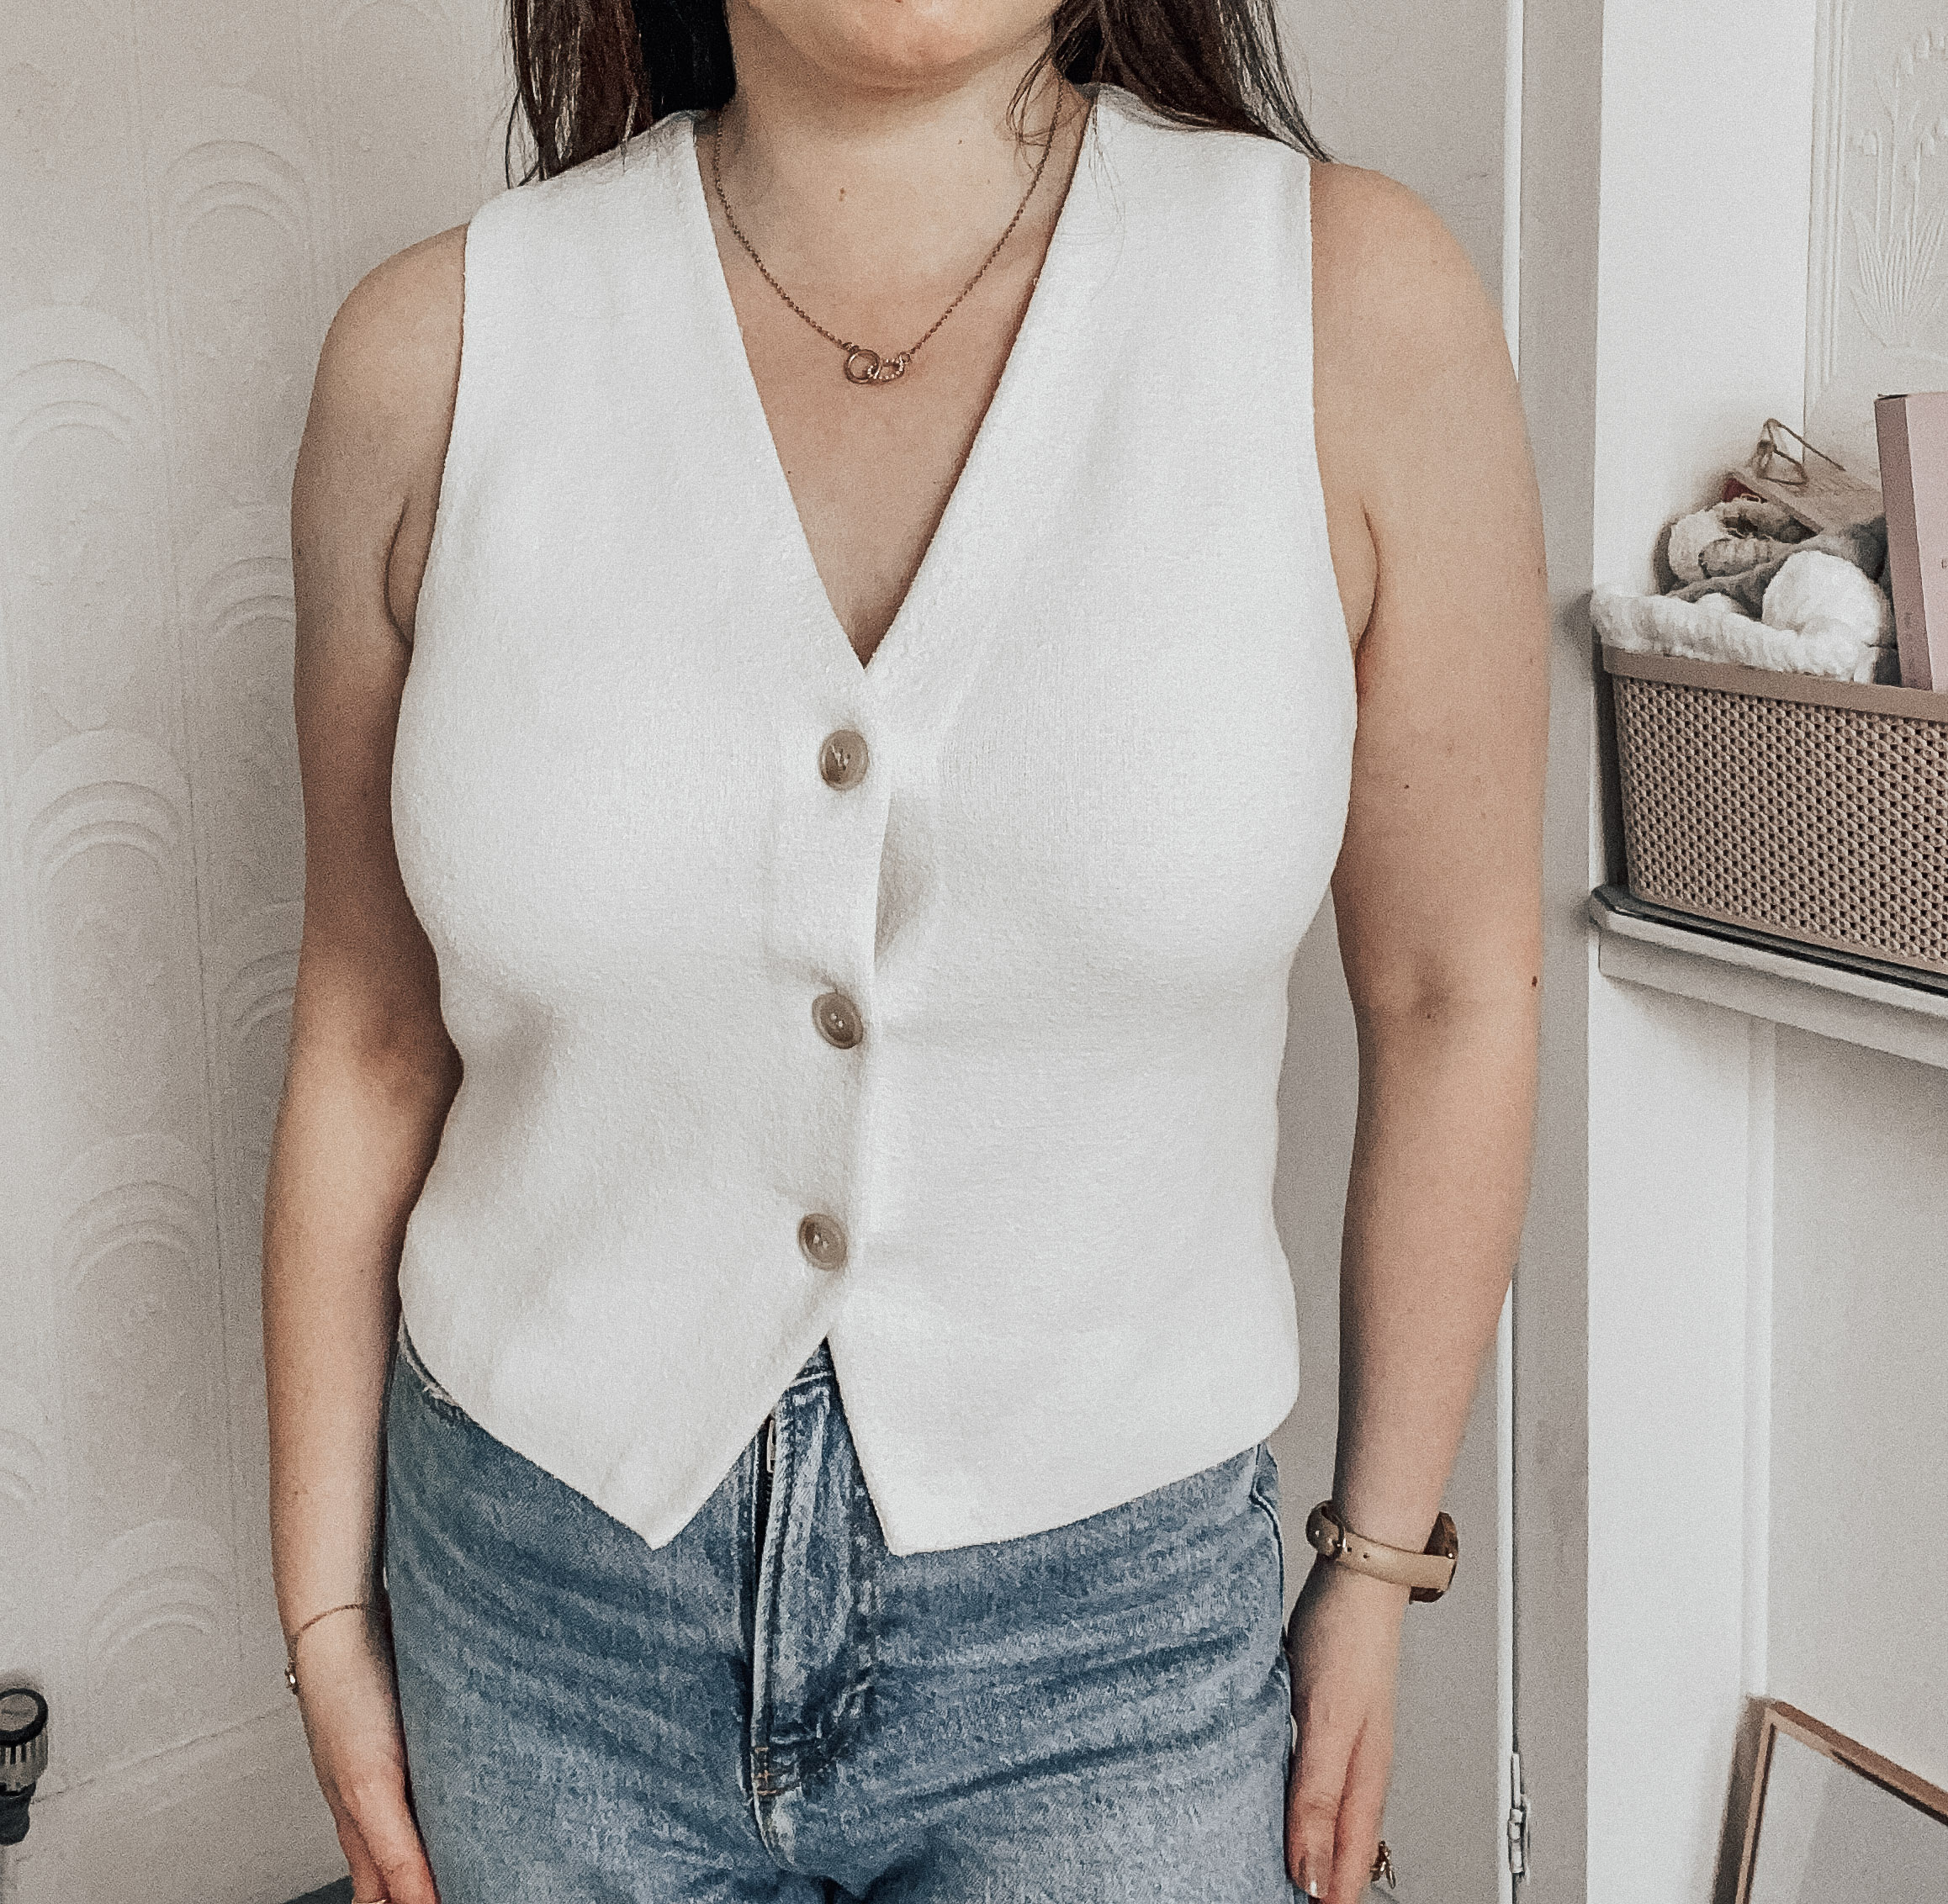
I've scoured my wardrobe and found different waistcoat looks for different occasions/seasons. I did have a lot of fun putting these looks together!
Here are my white waistcoat looks:
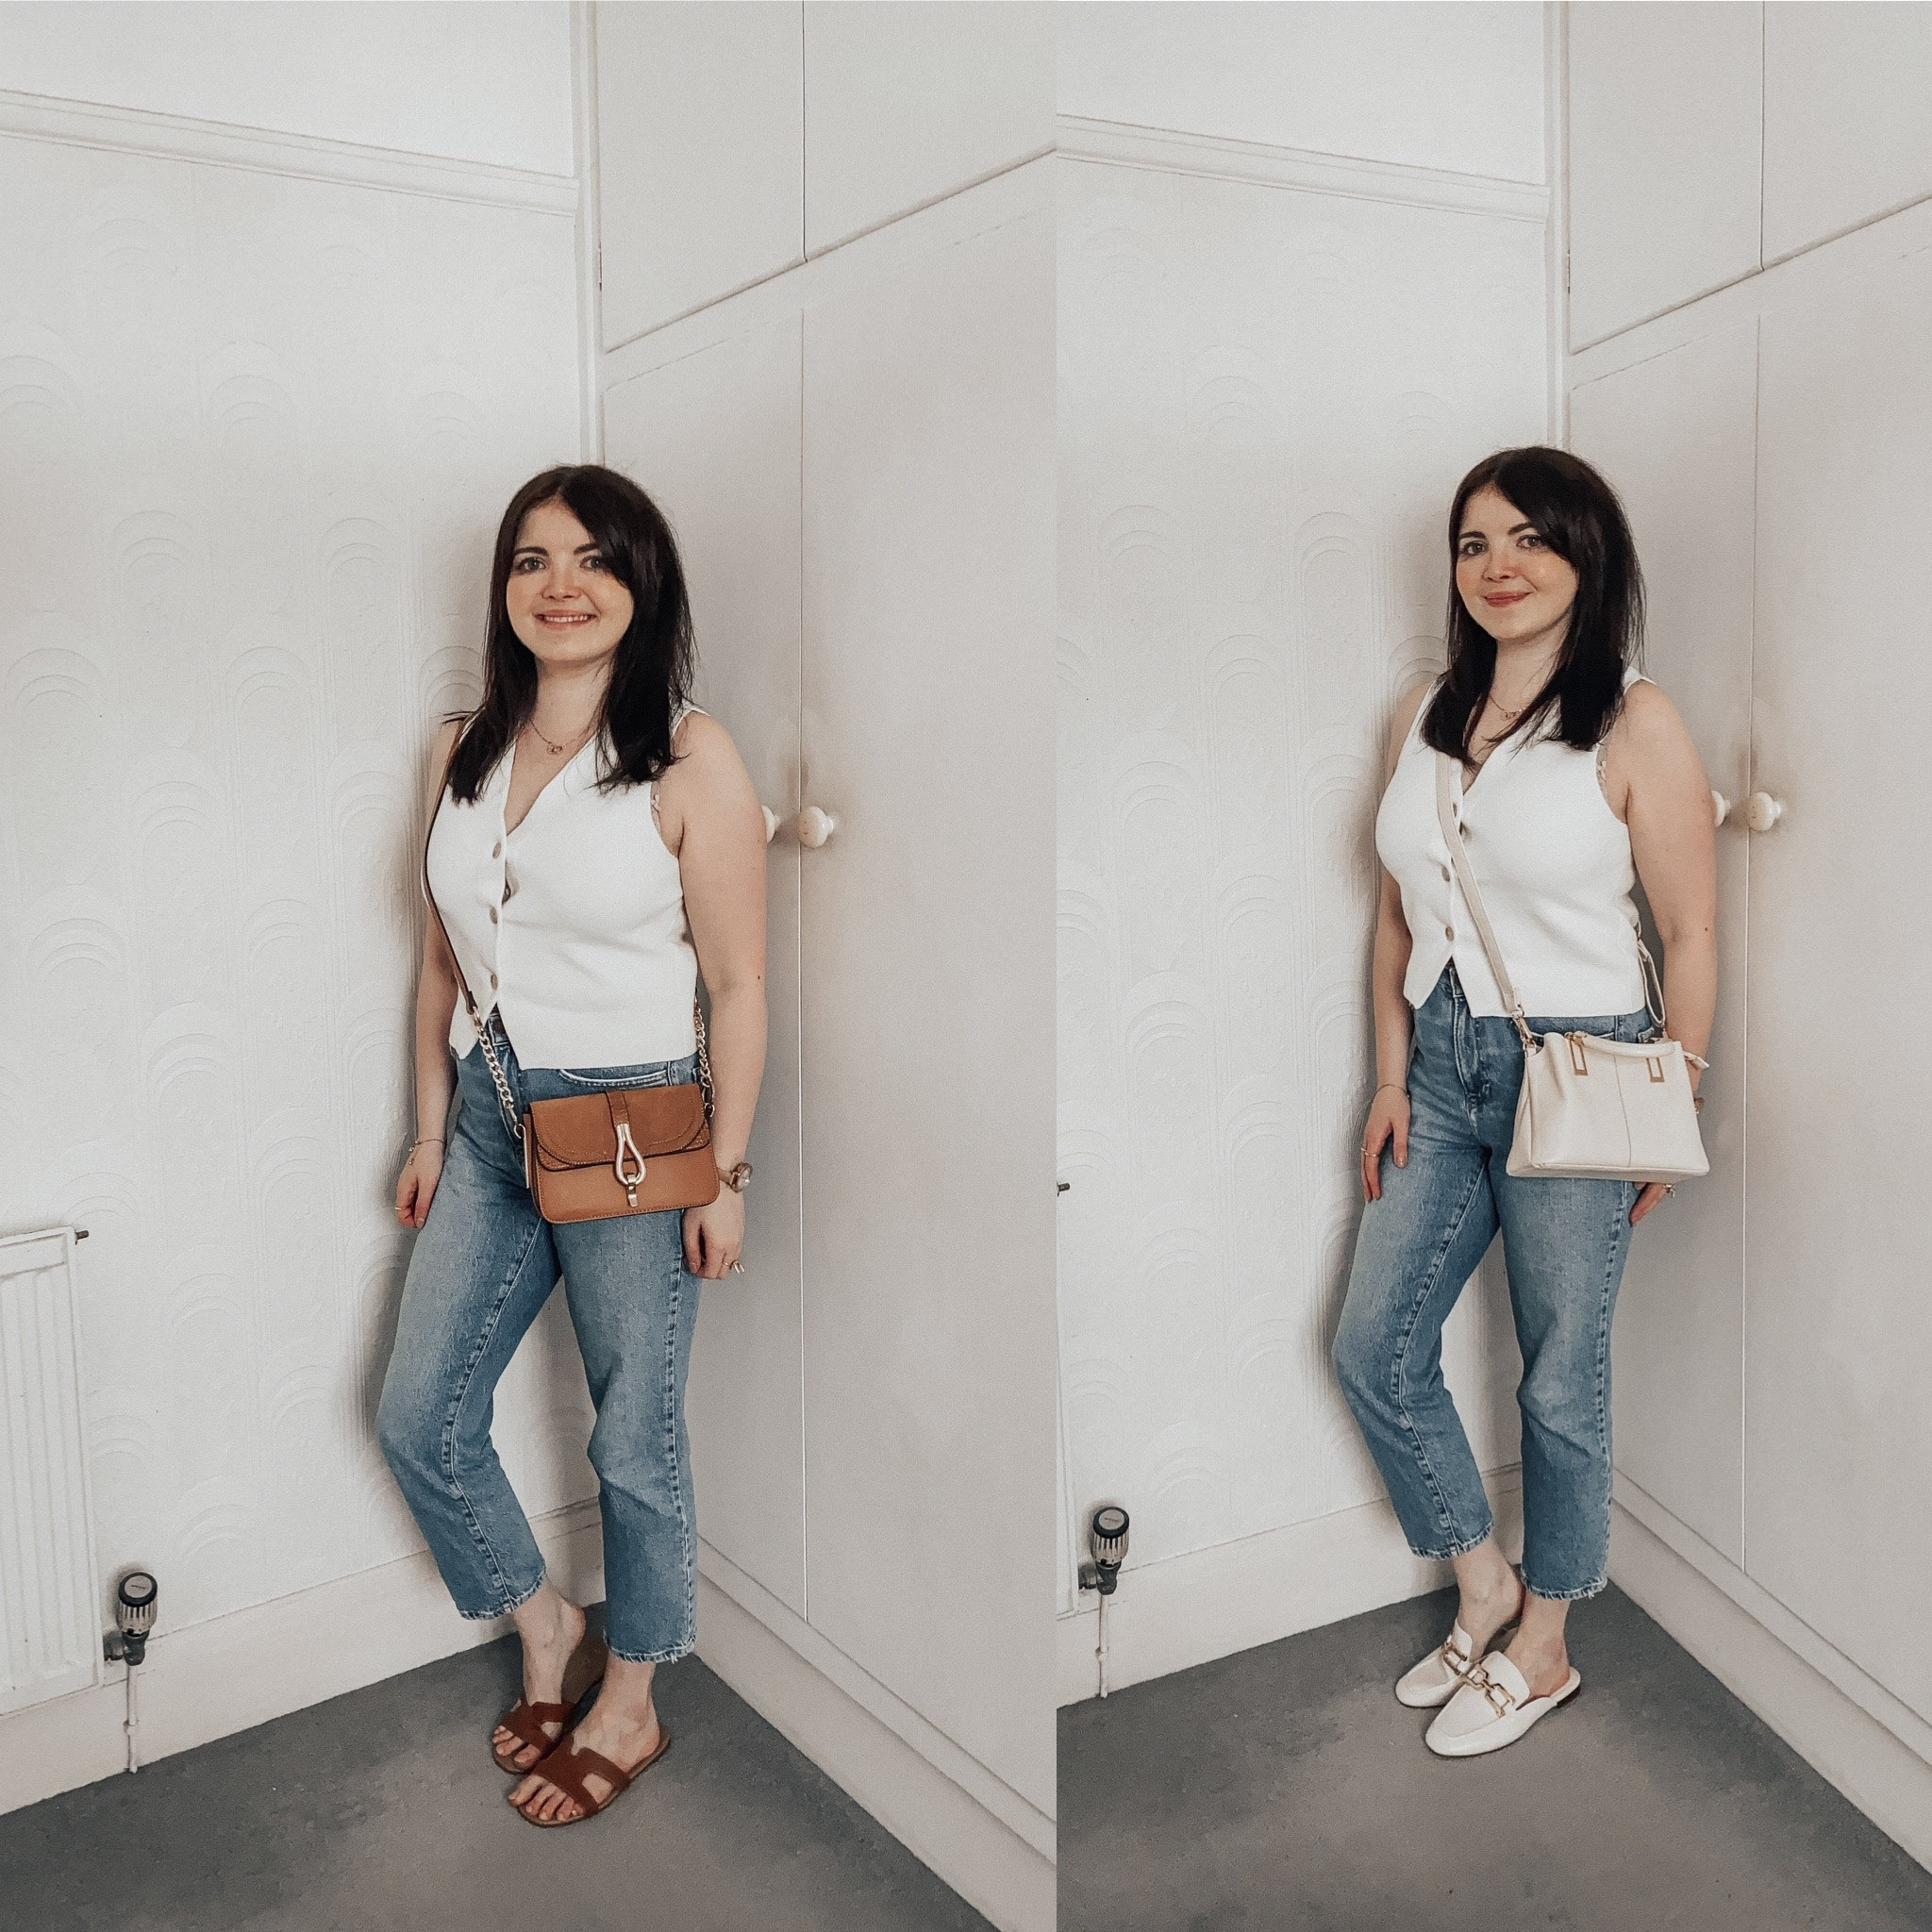
1) The Everyday Look
I like to wear this white waistcoat for that simple everyday look. Each look is styled with these New Look straight-leg jeans. The first look I've styled with New look tan sandals and an old Topshop crossbody bag. In the second look, I've styled it with loafers from *Stradivarius and a New Look crossbody.
2) The Day To Night Look
I love these looks as they're perfect to take you from day to night - with just a change of shorts. In the first outfit, the shorts are from Nasty Gal (from Vinted) and the tan sandals are again from New Look. The tan bag is the same one as the previous photo. In the second outfit, I paired the white waistcoat with ASOS denim shorts, Veja trainers and a New Look mini tote.
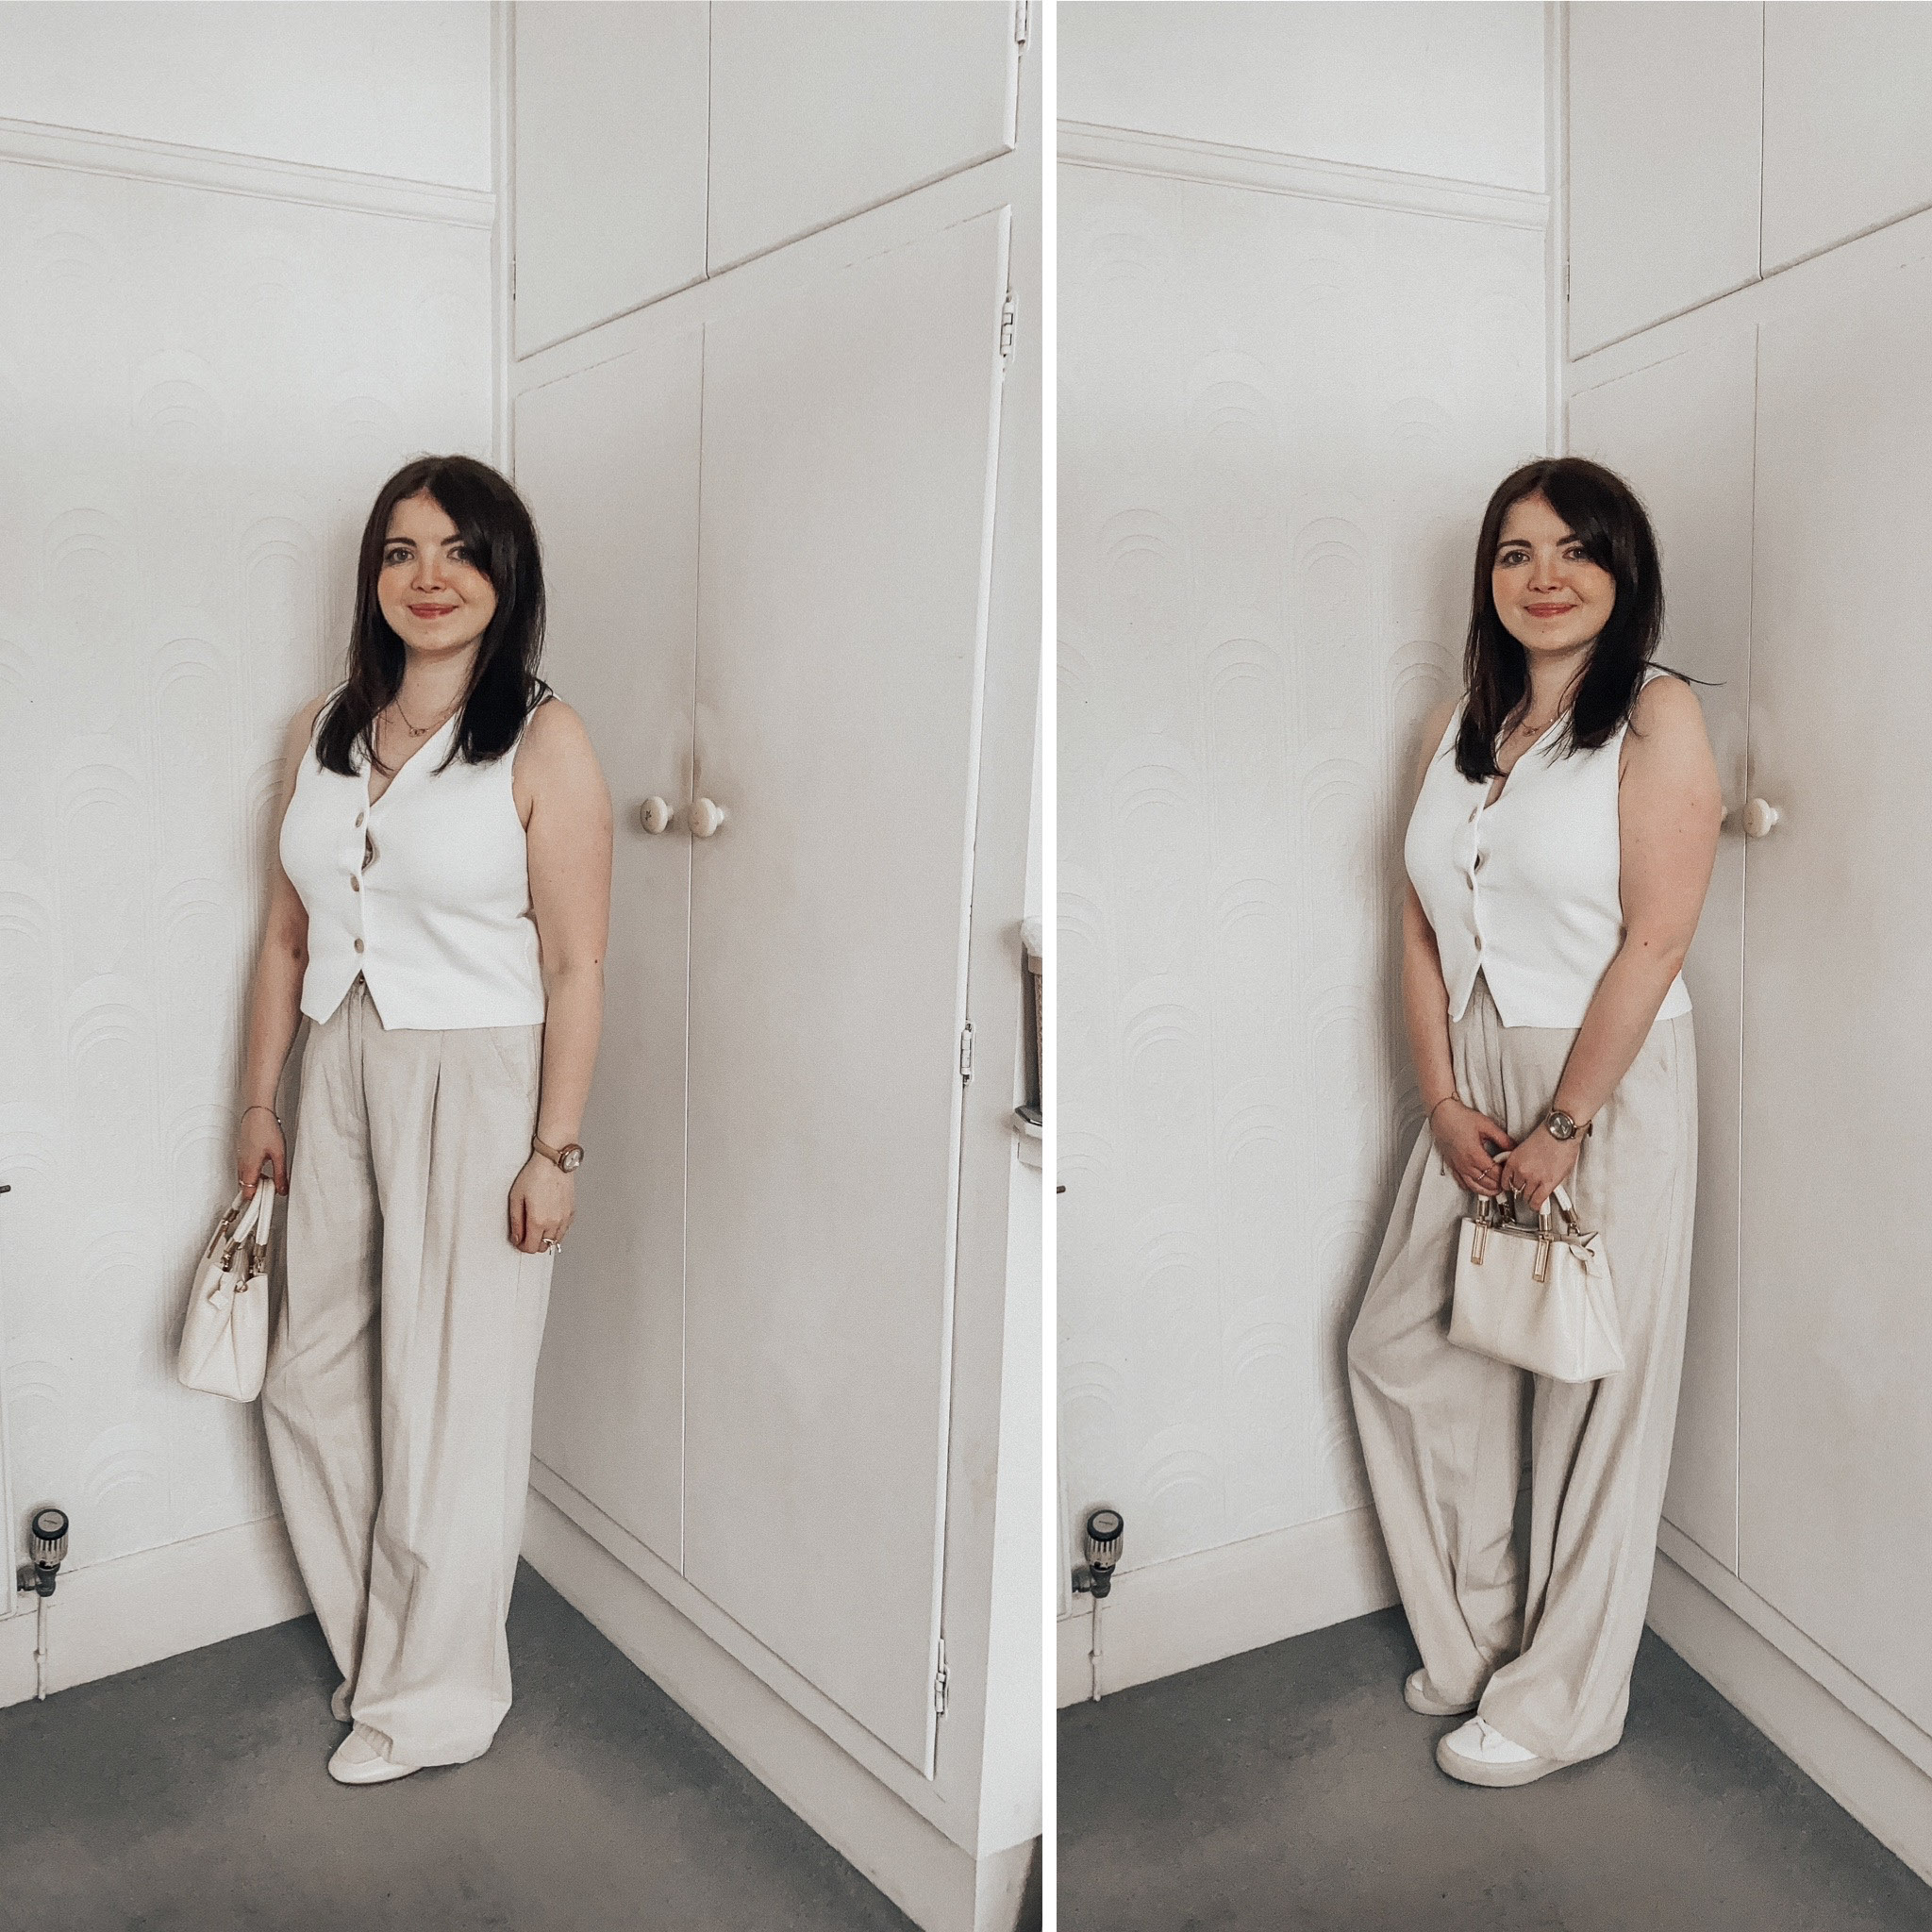
3) The Workwear Look
If you're fed up with wearing blacks/greys/navy's etc to work, try a little bit of this! I bought these workwear-style trousers from Vinted and they're such a lovely length and perfect for work! My shoes are loafers from Stradivarius in the first look. The bag again is from New Look. In the second look, I've changed the loafers to my Veja trainers. This will be a good look if you work in a more casual work setting.
I know the waistcoat trend won't last forever, but it's a trend I'm going to make the most out of by wearing the hell out of this waistcoat until it gets too chilly for me to wear! I have found some other waistcoats for you to look at if you'd prefer a different colour -
Let me know which waistcoat look is your favourite!
*There are affiliate links in this post (marked with an *). For more information, please read my disclaimer. Thank you for your support!
*This post is a paid AD. See the end of the post for more details. Having my nails done is a treat for me, whether I have them done at a salon or do them my…
You know those books you buy because you've seen so many people rave about it? This is how I came to buy How To Kill Your Family. Bella Mackie's deb…
*There are PR items from Ottoman Hands. Please read the end of the post for more details. I remember there being a time when I barely wore jewellery. Whet…
When I first started blogging, I never really had a step-by-step routine (as it were) to write a blog post. I think I just went with the flow and published whatever random idea I came up with. Over the years, I've established a better step-by-step routine in terms of writing a good enough blog post. Even though I was really nervous about sharing my blog and writing to the world, I loved the thought of sharing my thoughts, loves and sharing the same interests with some like-minded people.
I like to think that over the years, my blog has matured from my first days on Wix, which includes my writing and construction of a blog post. I'm not trying to be all 'up myself' here, but I'm so proud of how far I've come as a blogger and how far my blog has come too!
When it comes to writing a blog post, there's such a vast process when creating a blog post. From that lightbulb moment to hitting publish, there's a particular process which I follow to get my blog post to shine as much as possible.
Here is my step-by-step process of writing a blog post:
1) The lightbulb moment
All blog post ideas stem from a lightbulb moment. The first initial idea can completely arise from the simplest of thoughts. I could be inspired by a new top I've bought or it could stem from an article I've read in a magazine or online. The most annoying thing about getting that lightbulb moment is if it happens when I'm out and about and can't get it down quickly enough. Or worst case scenario, the idea pops out of my head as quickly as it went into my brain. Typical.
2) Brainstorm
If my idea isn't specific, then I like to write the topic in mind in the middle of the page and write sub-ideas relating to that big idea. It allows me to be more specific with the blog post I would like to write. This part is where I try and think about SEO and get the keywords right. I won't lie to you guys, I'm still learning about SEO even in my eighth year of blogging. SEO has been my biggest learning curve in blogging, but my knowledge is getting better! I tend to use a SEO checker when writing a blog post so I know the SEO will be ok before I hit publish.
3) Writing the blog post
Now here comes the main bit - writing said blog post. This is the most time-consuming part of the process, for obvious reasons. Not only do I need to write the post, I need to make sure the grammar is ok, come up with a catching title, make sure there are no spelling mistakes, make sure it all makes complete sense, and add the subheadings I need to...the list is endless. This part of the blog writing process I find quite therapeutic as I love writing!
4) Time for imagery
Once I'm happy with the blog post, it's time to get the creative juices flowing and come up with images to add to the blog post. I'm someone who likes to use my own images, just a personal preference. I do love shooting photos and I know that when I shoot photos, I know I'm reaching the end of the blog post process when I started shooting the photos!
5) Final checks
Once I've added the photos, I do my final checks to make sure everything is in working order. Sometimes this involves a double or triple check.
6) Hit publish
It's time to nervously hit the publish button! This is when I get a little nervous as I hope the post performs well and that anyone who reads it also loves the post I've written as much as I do!
If you'd like to know how to craft the perfect blog post, please read Eleanor's e-book *'The Art of Blog Writing'. This e-book is great if you want to learn the art of blog writing and a step-by-step guide on how to write a killer blog post! I've certainly learned a lot from reading it myself!
If you're a blogger, I'd love to know your step-by-step process of writing a blog post! Is it similar to mine? Let me know!
*This post contains an affiliate link. It is marked with an asterisk (*). For more information, please read my disclaimer. Thank you for your support!
When I first started blogging, I never really had a step-by-step routine (as it were) to write a blog post. I think I just went with the flow and published …
Subscribe to:
Comments (Atom)


